Hey everyone, it's Julianne here back with a card I know Vanessa is going to love! I'm sure if you follow either Vanessa or I on social media you saw that I recently had the most amazing opportunity to visit New Hampshire and teach some classes at Butterfly Reflections. Teaching was amazing and I had fun spending my time with other crafters, but I have to say the best part was being able to SHOP! If you haven't had a chance to visit the store, I so recommend it. It was amazing seeing all the wonderful brands all together in one place.
 But let's get back to my card for today I'm going to be making a card that features some Waffle Flower Crafts products that I picked up while at the store, Mailbox Die, Sweet Sentiments Stamp Set, (Sweet Mailbox Stamp & Die), Sending Love Stamp & Die and finally Layering Woodgrain Stamp Set.
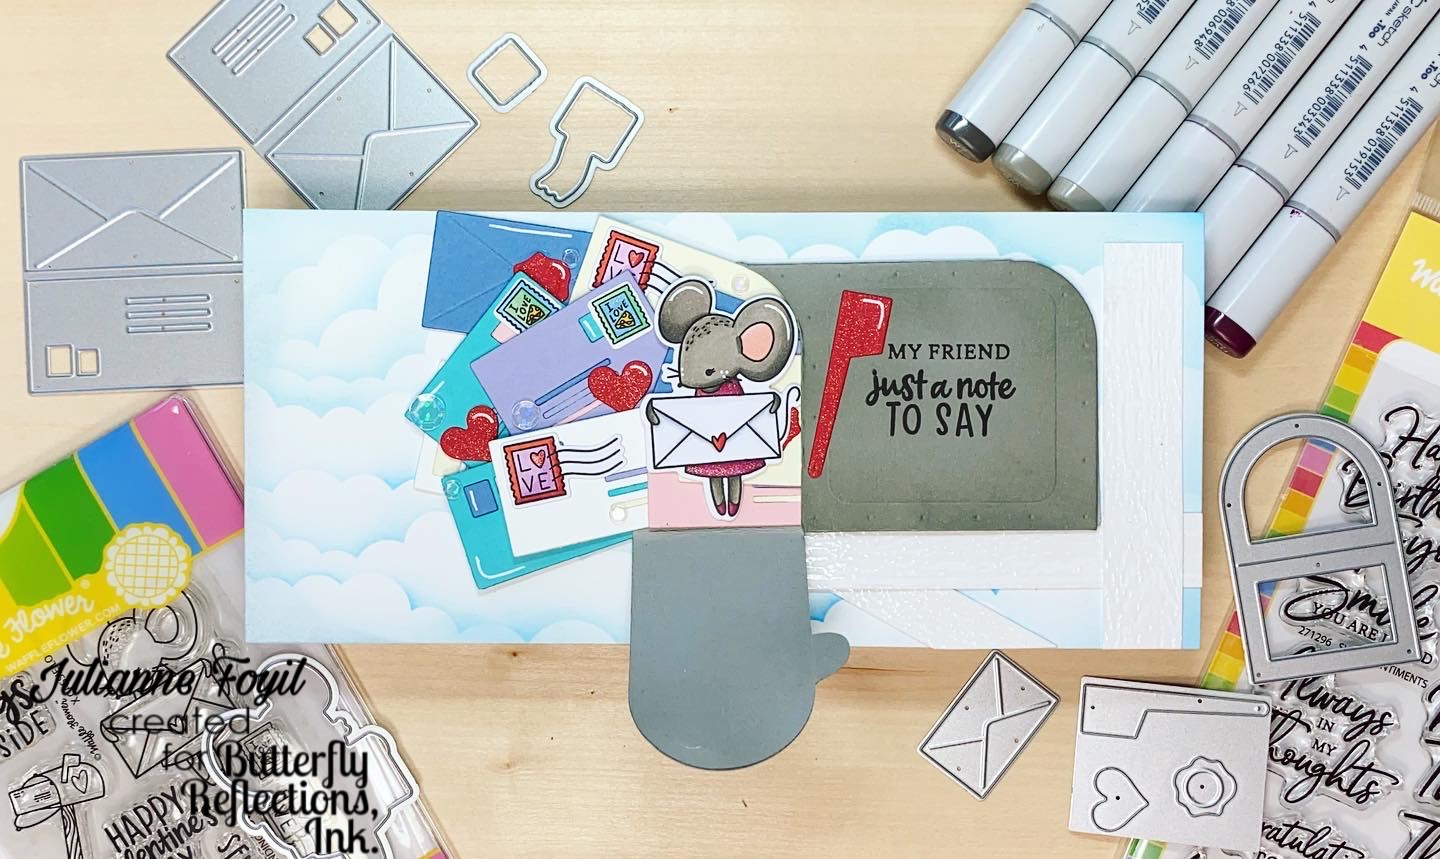
 While visiting the store, there was a day where Vanessa received at least 15 packages of new goodies so I wanted my mailbox to be full of mail, so I decided to make a slimline card. To do this I cut my background to 4 x 8.5 and my card base at 8 x 8.5, scoring at 4.
 I die cut my mailbox and envelopes out of a bunch of different card stocks from MFT and started piecing them together. Whether you decide to use the small or larger envelope for your card they both come with the front and back for adhering. I also die cut a bunch of the add ons for the mailbox and envelopes as well. After assembling all my envelopes, I started working on my background. I knew that I wanted to have cloud background for my card so to achieve that I did some ink blending with my distress oxide inks in Tumbled Glass, Salty Ocean and used the Mini Cloud Edges Stencil.
 Once my background was complete I stamped my sentiment onto my mailbox and on the inside of the card. For both sentiments I used Sending Love and the Sweet Sentiments stamp sets. I chose to piece together sentiments from both so that my sentiment would read 'My Friend just a note to say Hello' I also stamped out the little mouse and multiple of the stamp images coloring them with copic markers before die cutting them with the coordinating dies.
 Once I had everything done I started working on putting my card together but soon realized that my card was missing something, the mailbox was just floating in the sky. I needed to create a mailbox post, in order to do this I used the Layering Woodgrain Stamp set and clear heat embossed onto some watercolor paper. This gave my posts some much needed texture. I stamped the image twice before cutting down into stripes and adhered my post to my background using liquid adhesive. Once that was complete I started putting the rest of my card together. When adhering the mail I wanted to make sure that the stamps I had colored weren't getting covered as well as the ink blots add on dies. Once I had everything adhered I added the sweet little mouse right on top using some thin foam adhesive and my card was complete.
If you would like to see how this card came together, my YouTube video is below. If you enjoy my video please like and subscribe.
I want to thank you all for stopping by I so appreciate it. The new design team this term has been making some truly amazing cards, so make sure to visit their blog posts for even more inspiration. Now off to the postal service to get this mailed to Vanessa, Happy Crafting everyone!


If you would like to see how this card came together, my YouTube video is below. If you enjoy my video please like and subscribe.
Comments
Post a Comment